Light-up Numbers
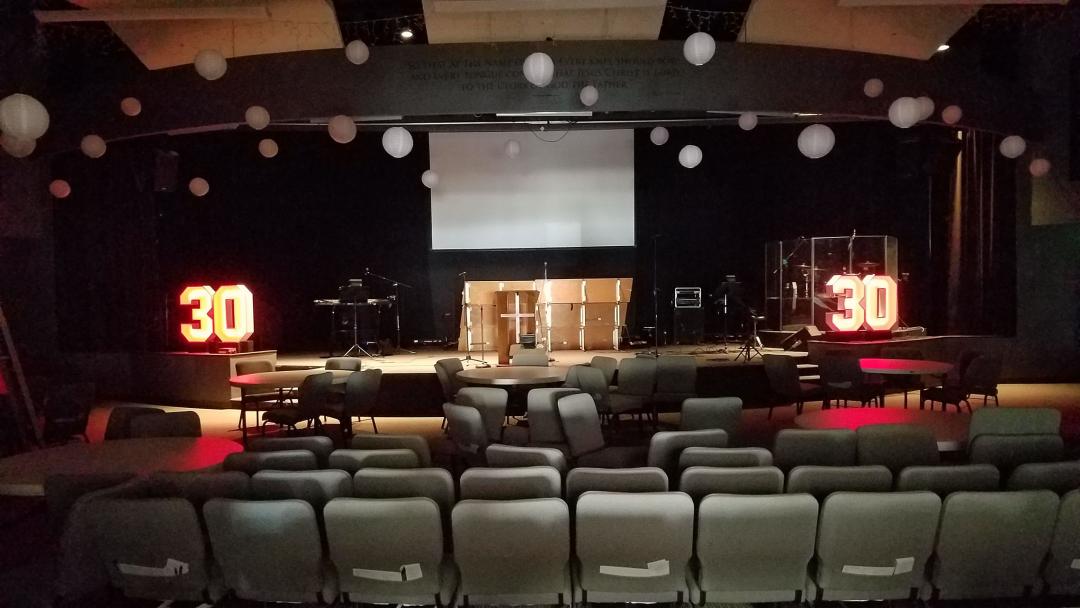
My church was celebrating 30 years of ministry in the South Bay and the team in charge of decorating wanted some large numbers to put up on the stage. The idea came up of making them 3D and having them light up since during service the auditorium gets pretty dark.
I sketched up a set of numbers to get all the lengths and angles needed for a full parts list and material breakdown with color-coding. I opted to go with 3/4" MDF as shaping the parts would be very simple and provide a uniform surface for paint.

After I cut all the parts, I grouped and labeled them with blue tape and a Sharpie to keep them organized. I did a test assembly of each number to ensure all the parts were sized properly and the angles all worked out.

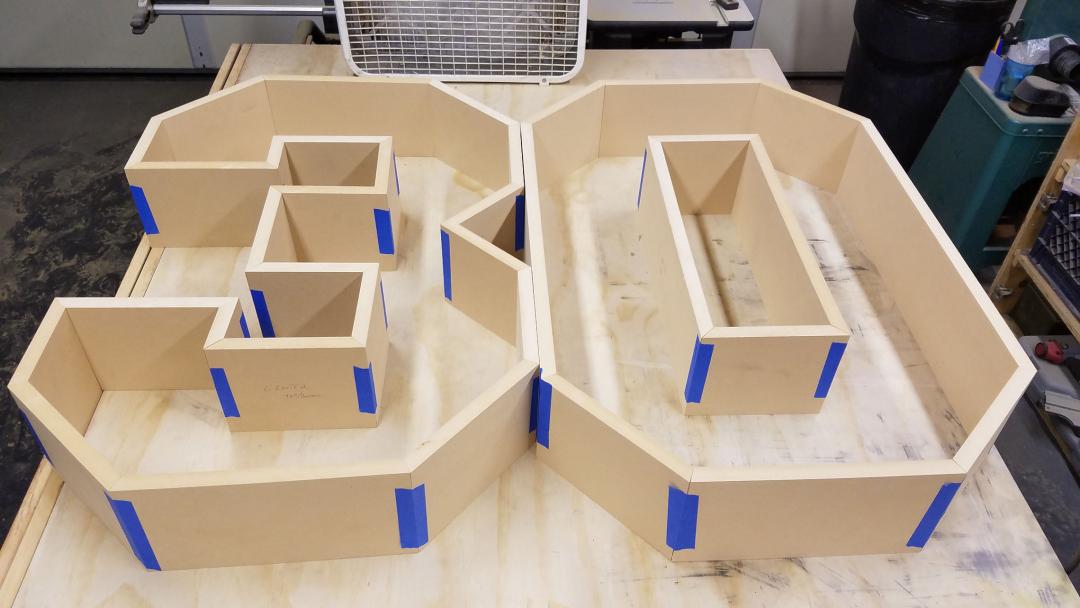
Once the parts were verified for size, I ran every part through my router table to add a rabbet on the top and bottom inside surface to accept the front and back panels.
Then I glued everything up. I used blue tape on the outside of each joint to act as a clamp. I spread wood glue on each side of the joint, then folded the numbers into shape.

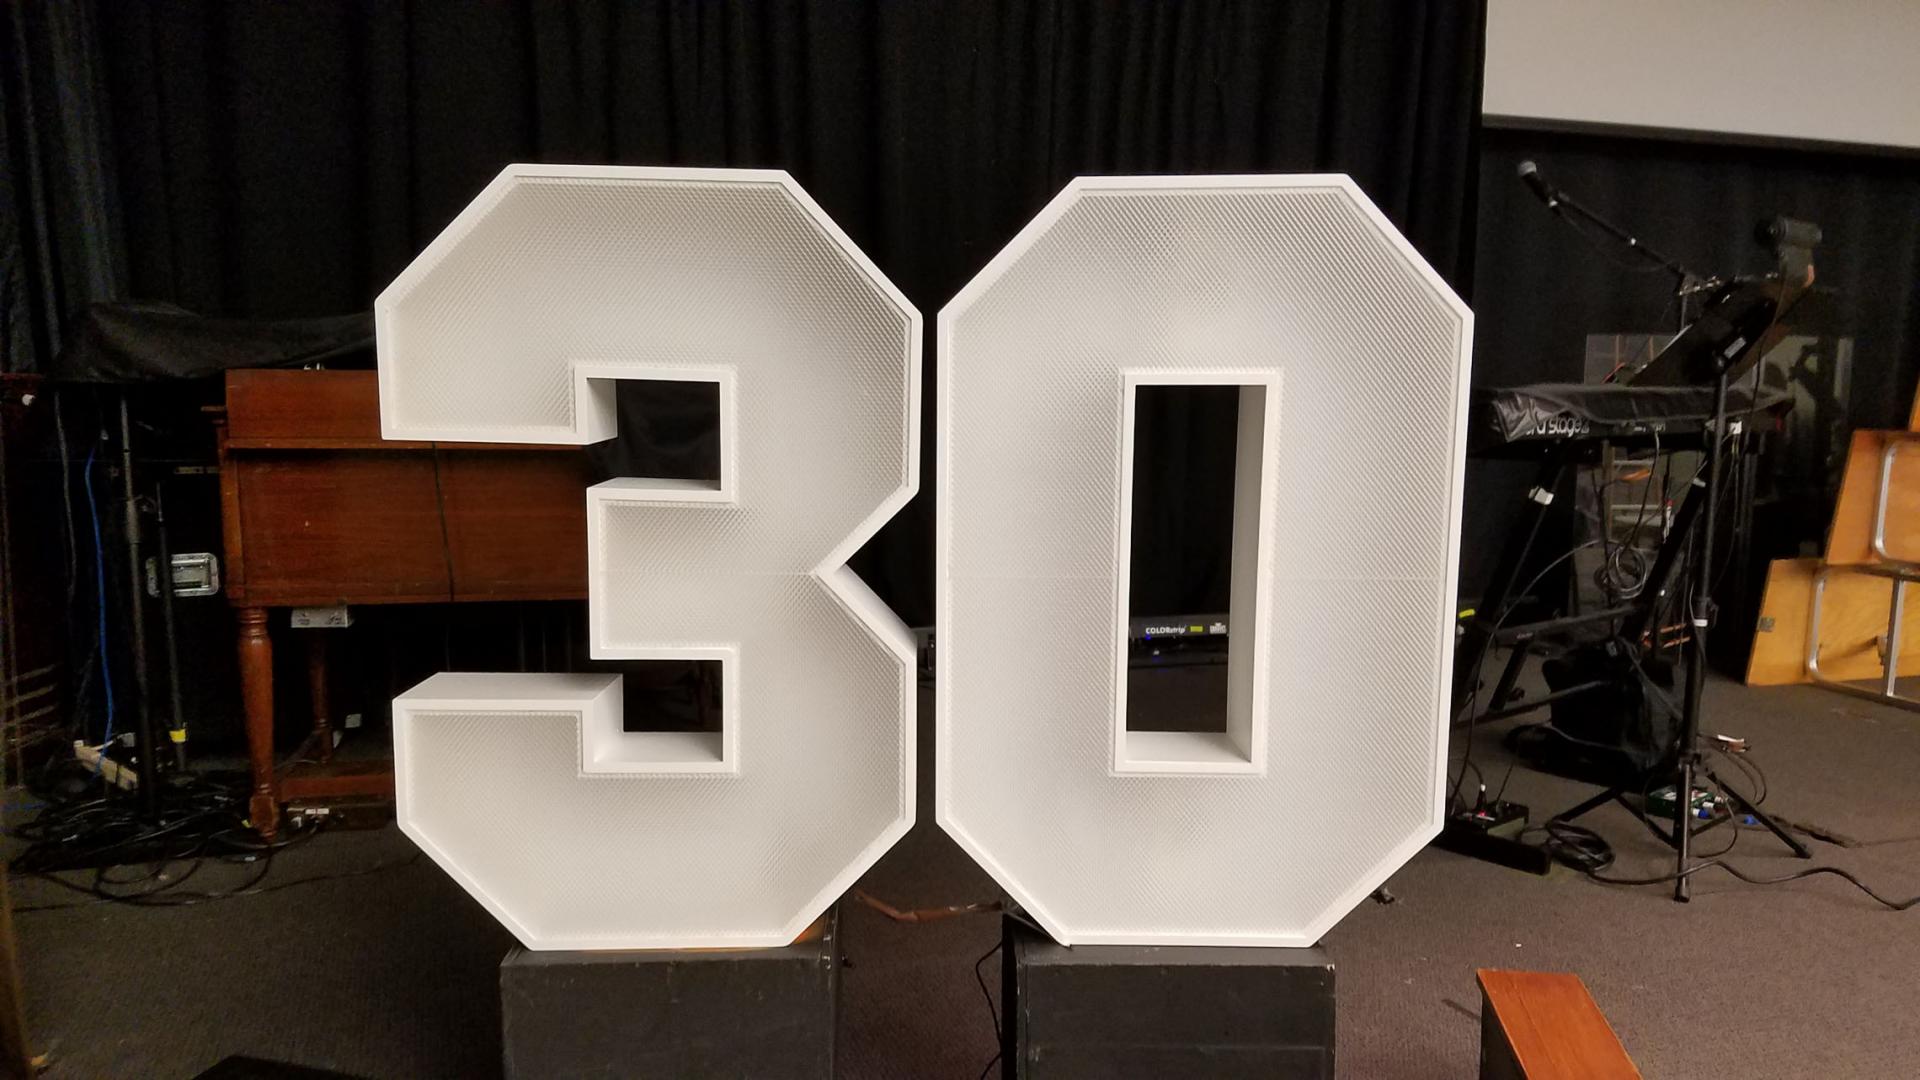
After the glue dried, I covered the numbers with a few coats of paint inside and out. Then I could trace and cut out the back solid panels and the front acrylic panels. I used commercial ceiling light diffuser panels and cut them to shape with a cutting wheel on a rotary tool (Dremel).
The front panels were held in place with clear silicone, while the back panels were held with screws.

I mounted some RGB LED strip lights to the back panels and they were all set. With the auditorium lights up and the LEDs off, they look like normal white numbers, but with the lights dimmed and the LEDs on they shine nice and bright. And the lighting crew was able to select the color they wanted the numbers to be via the RGB controllers.